How to Use a Plaster Saw Effectively for Best Results?
Using a Plaster Saw effectively can significantly enhance your renovation projects. This specialized tool is designed for precise cutting through plaster and drywall. However, many users struggle with its full potential. Understanding its features and techniques is essential.
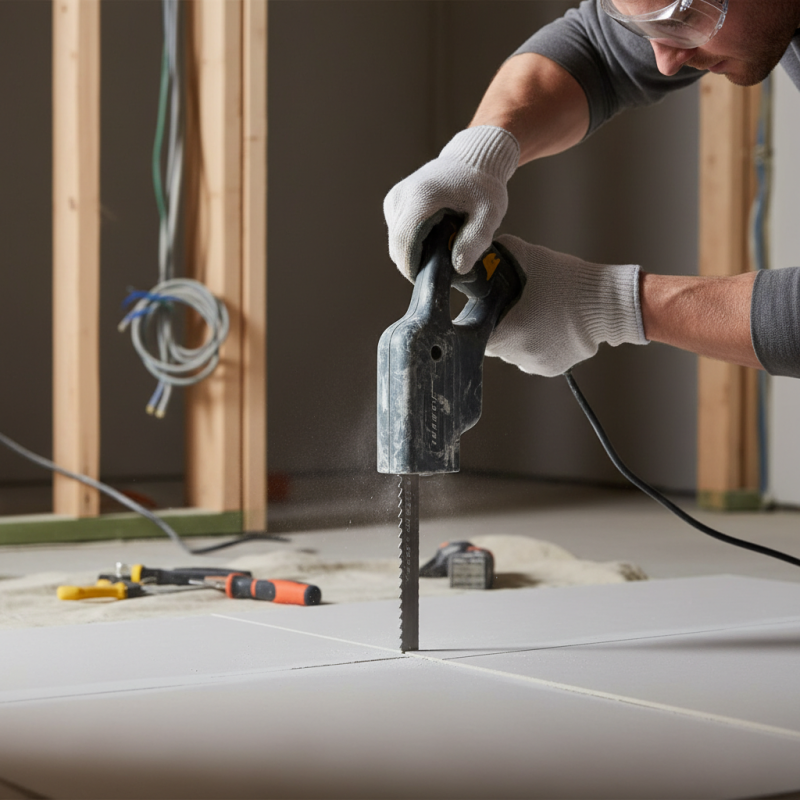
When using a Plaster Saw, focus on safety and control. The tool is sharp, and incorrect handling can lead to accidents. Practice on scrap material before starting your main work. This helps build confidence and accuracy. Remember, a steady hand yields cleaner cuts.
Precision is crucial when dealing with plaster. Often, users rush the process. This can result in jagged edges and additional repair work. Aim for patience, and take your time. Adjust the cutting angle to achieve the best outcome. Mastering the Plaster Saw takes practice, but the results are rewarding. Embrace the learning curve, and refine your technique.
Understanding the Plaster Saw: Features and Types
When choosing a plaster saw, understanding its features is essential. These saws typically come with a specialized blade that is designed to cut through plaster efficiently. The blade’s teeth are sharp and closely spaced, allowing for precise cuts. The handle is often ergonomically designed, providing a comfortable grip during use. This design helps minimize fatigue, especially when performing intricate cuts.
There are various types of plaster saws available. Some feature straight blades, while others have curved edges for more flexibility. Each type has its benefits. A straight blade is often better for long, straight cuts. In contrast, a curved blade is ideal for corners and tight spaces. It's crucial to select a type that aligns with your project needs. Reflections on previous uses can guide future choices; mistakes in selecting the wrong type lead to inconsistent results.
Using a plaster saw effectively requires practice. Even with the right tool, technical difficulties can arise. Sometimes, the blade may bind, requiring you to backtrack. This can be frustrating and disrupt workflow. Patience is key. Each cut teaches valuable lessons about angles and pressure. Don't be discouraged by imperfections; they often reveal areas for improvement.
Preparing Your Work Area for Safe and Efficient Cutting
Creating a safe and organized workspace is key when using a plaster saw. Start by ensuring your area is well-lit. Natural light is great, but if that’s not possible, use bright LED lights. A clean floor is equally important. Remove any debris that might cause slips or trips. Keep your workspace tidy; clutter can lead to mistakes or accidents.
Next, gather all your tools beforehand. This includes safety glasses, gloves, and hearing protection. Lay everything out within arm's reach. You won't want to search for tools mid-cut. If you have any distractions around, they can disrupt your focus. Limit noise and put away your phone. You want to be fully engaged in the task at hand.
Be mindful of your posture and stance while cutting. If you’re uncomfortable, it can affect the quality of your work. Take breaks if you feel fatigued. Resting prevents mistakes and injuries. Reflect on your technique after each cut. Was the angle right? Was the saw too heavy? Adjusting your approach can significantly improve your results.
How to Use a Plaster Saw Effectively for Best Results? - Preparing Your Work Area for Safe and Efficient Cutting
| Preparation Step | Description | Safety Tip |
| Clear Workspace | Remove any clutter and debris from the area where you will be cutting. | Ensure the floor is clean to prevent slips. |
| Gather Tools | Ensure you have all necessary tools, including a plaster saw, protective gear, and a measuring tape. | Wear gloves and a mask to protect against dust. |
| Measure Twice | Take precise measurements of the area to be cut. | Double-check measurements to avoid cutting mistakes. |
| Mark Cutting Line | Use a pencil to clearly mark your cutting line. | Make the line visible to ensure accuracy. |
| Secure the Plaster | Use clamps or a stable surface to secure the plaster board before cutting. | Ensure stability to prevent movement during cutting. |
| Cut with Care | Slowly guide the plaster saw along the marked line, applying even pressure. | Keep fingers clear of the cutting path. |
Techniques for Proper Grip and Handling of a Plaster Saw
Using a plaster saw properly is crucial for achieving clean cuts. A proper grip is essential. Your hands should be positioned evenly. Hold the handle firmly but not too tight. Relaxed fingers allow better control. Make sure the blade's teeth face outward. This ensures efficient cutting.
When handling a plaster saw, pay attention to your body posture. Stand with your feet shoulder-width apart. Maintain a slight bend in your knees. This stance provides stability while you work. Avoid tension in your shoulders. Keep them relaxed to avoid fatigue.
Cutting with a plaster saw requires practice. Adjusting your grip based on the material is often necessary. You may slip occasionally, which can lead to uneven cuts. Reflect on your technique after each session. This way, you can discover areas for improvement. You'll develop a feel for what works best for you.
Step-by-Step Guide to Cutting Plaster with Precision
Cutting plaster can be tricky, but using a plaster saw effectively can make the process smoother. Start by marking your cutting line clearly. Use a straightedge for precision. A sharp pencil will make your lines stand out. Take a moment to double-check your measurements. Mistakes can happen easily if you rush. Once marked, secure the plaster board to prevent movement during cutting.
Begin sawing with steady, gentle strokes. Don’t apply too much pressure; this can lead to uneven cuts. Focus on following your marked line closely. It’s okay if your first cut isn’t perfect. Each attempt is a chance to improve your technique. Be aware of the fine dust produced while cutting. Wearing a mask could enhance your comfort.
After finishing the cut, examine the edges. If they’re rough, you might need to refine them with sandpaper. Sometimes it's necessary to adjust your original plan when things don't go as expected. Reflecting on your process will help you learn. The key is practice. With each use, you’ll gain more confidence and skill.
Maintenance Tips for Prolonging the Life of Your Plaster Saw
Maintaining your plaster saw is crucial for efficiency and longevity. Regular care can prevent breakdowns during projects. Always clean the saw after every use. Dust and plaster residue can build up and affect performance. Use a soft brush to remove debris. Don't forget to check the teeth of the blade. A dull blade leads to poor cuts and increased effort.
Lubrication is another essential task. Apply oil to any moving parts regularly. This helps to reduce friction and wear. It’s an easy step, yet many overlook it. A well-lubricated saw operates smoothly and efficiently. Additionally, store your plaster saw in a dry place. Moisture can cause rust, damaging the tool over time.
Reflect on your usage habits too. Are you applying too much pressure when cutting? This can increase wear. Use a steady, controlled motion; it’s more effective. Also, be aware of how you handle the saw. Improper handling can lead to accidents and tool damage. Take the time to ensure you’re using the saw correctly.
How to Use a Plaster Saw Effectively for Best Results?
This chart showcases the importance ratings of various aspects related to the effective use of a plaster saw. Ratings are based on user feedback, assessing comfort during cutting, durability of the saw, recommended maintenance frequency, user skill levels, and essential safety measures.